
Installing the ESP8266 File System Uploader for Arduino IDE
Prerequisites:
Make sure you have installed the ESP8266 libraries for the Arduino IDE. If you have not done so, follow these steps: Installing ESP8266 Libraries
Have an ESP8266 board available to test
Part 1: Installing the Plugin
Step 1: Download the File System Uploader plugin for Arduino IDE
Download the latest release of the file system uploader plugin from https://github.com/esp8266/arduino-esp8266fs-plugin/releases

Step 2: Install the File System Uploader plugin
Unzip the file downloaded from there link above. You will now have a folder called ESP8266FS. Drag or copy that folder into your Arduino directory’s tools folder. Your Arduino directory can be found by opening Arduino preferences and looking at the “Sketchbook location” path.


Step 3: Restart your IDE
If your Arduino IDE is running, go ahead and restart it.
Step 4: Check the installation
To confirm your plugin has installed, with your Arduino IDE running, check the Tools menu for a new option, “ESP8266 Sketch Data Upload”

Congratulations! You have successfully installed the ESP8266 File System Uploader plugin! Let’s move on to Part 2 to learn how to use it.
Part 2: Using the Plugin
Step 1: Create and save a Sketch
First we need to create and save a new sketch. You can save the sketch to your preferred location. I have saved my project as ESP8266FSU_Test on the Desktop.
Step 2: Make a data Folder
Open your new sketch folder and make a new directory inside called data

Step 3: Add your data (HTML and CSS)
We are going to add some basic HTML and CSS files to the data folder. You can add anything you want to this folder (with size limitations) except additional folders. All files will be stored in a flat structure, but in addition to HTML and CSS, you could add configuration files, images, javascript, etc.
In the data directory, let’s create a new file called index.html and add the following HTML code:
<html> <head> <link rel="stylesheet" href="styles.css"> </head> <body> <h1>Hello World!</h1> </body> </html>
Next, let’s add some style to our <h1> element. In the data directory, create a new file called styles.css and add the following CSS code:
h1 {
    background: #1470af;
    color: aliceblue;
    margin: 10px;
    padding: 5px;
    width: 180px;
    border-radius: 7px;
}
Your project folder should now look something like this:

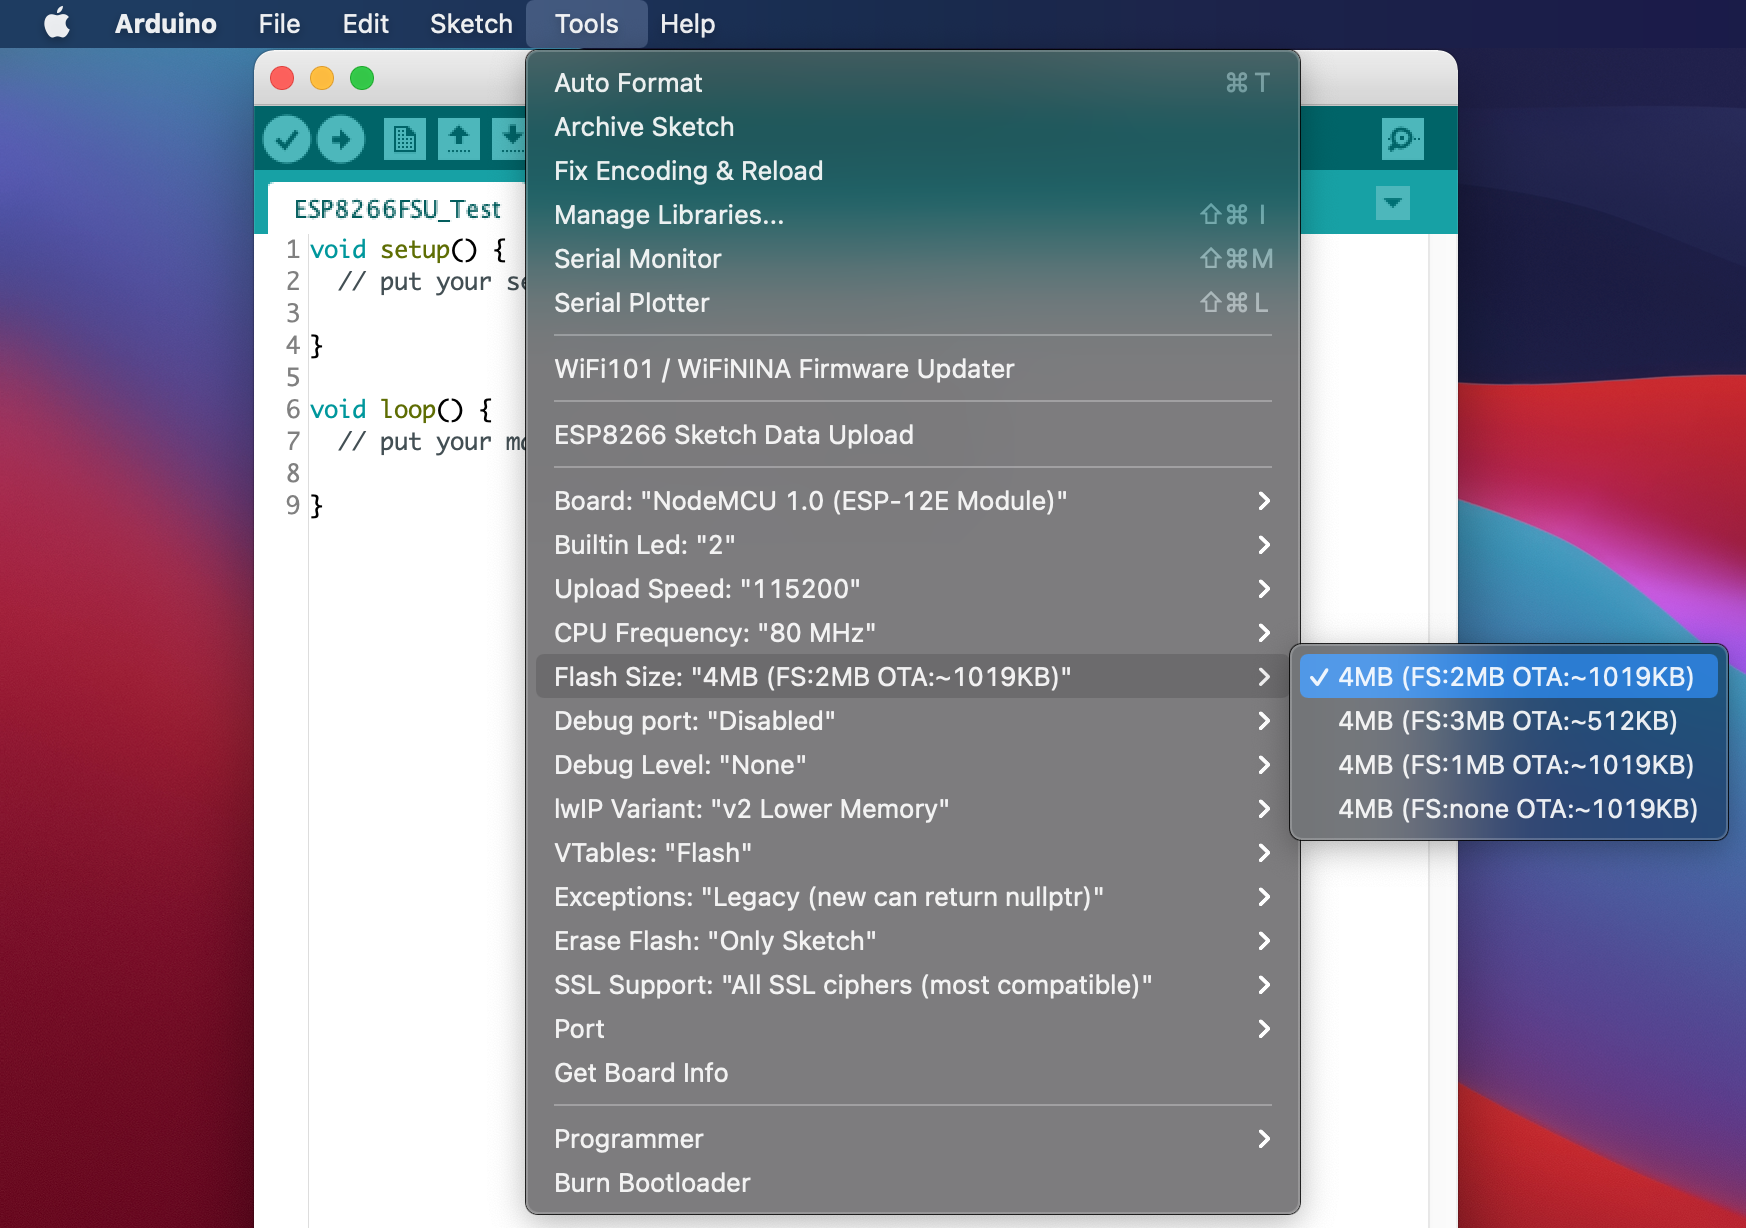
Step 5: Select Flash size and Port

Step 6: Upload the data
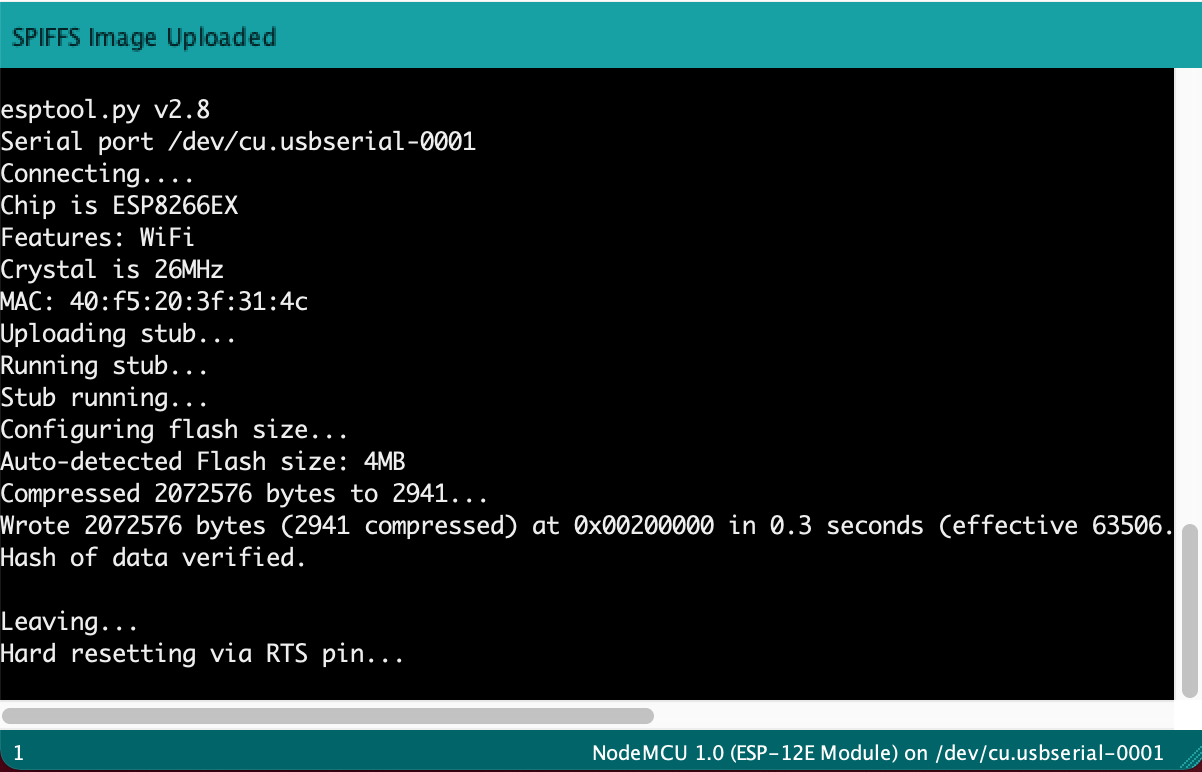
With the ESP8266 plugged into the computer, flash size, and port selected, we are now ready to upload the data. Go ahead and click the “ESP8266 Sketch Data Upload” option in the tools menu. You should see some messages scrolling in the console. It will look like this when complete:
On recent versions of MacOS you may encounter the following error:

Don’t worry though! There is an easy fix for this…
Open ~/Library/Arduino15/packages/esp8266/hardware/esp8266/2.7.4/tools/pyserial/serial/tools/list_ports_osx.py with a text editor.
Comment out lines 29 and 30 by adding a # to the front of each line
Add the following lines below 29 and 30:
iokit = ctypes.cdll.LoadLibrary('/System/Library/Frameworks/IOKit.framework/IOKit')
cf = ctypes.cdll.LoadLibrary('/System/Library/Frameworks/CoreFoundation.framework/CoreFoundation')
Lines 29 - 32 in your list_ports_osx.py file should look like this:

You can copy and paste the 4 lines from below!
#iokit = ctypes.cdll.LoadLibrary(ctypes.util.find_library('IOKit'))
#cf = ctypes.cdll.LoadLibrary(ctypes.util.find_library('CoreFoundation'))
iokit = ctypes.cdll.LoadLibrary('/System/Library/Frameworks/IOKit.framework/IOKit')
cf = ctypes.cdll.LoadLibrary('/System/Library/Frameworks/CoreFoundation.framework/CoreFoundation')
Re-run the “ESP8266 Sketch Data Upload” and you should have successful results!
Part 3: Testing your work
Step 1: Upload a simple http web server sketch
Now that our HTML and CSS data is on the ESP8266 board, we need some way to serve it up and view it! For this we will write a simple HTTP server that we can navigate to in an internet browser to view out static webpage. For this to work, you will need to configure the ESP8266 to connect to your wifi network and display it’s IP address so you can easily connect.
Write and upload the following code to your ESP8266 (make sure you change the ssid and password char* consts to your network SSID and password).
#include <ESP8266WiFi.h>
#include <ESPAsyncTCP.h>
#include <ESPAsyncWebServer.h>
#include <FS.h>
#include <Wire.h>

const char* ssid = "yournetworkssid";
const char* password = "yourwifipassword";

AsyncWebServer server(80);

void setup() {

  Serial.begin(115200);

  // Initialize SPIFFS
  if(!SPIFFS.begin()){
    Serial.println("An Error has occurred while mounting SPIFFS");
    return;
  }

  // Connect to Wi-Fi
  WiFi.begin(ssid, password);
  while (WiFi.status() != WL_CONNECTED) {
    delay(1000);
    Serial.println("Connecting to WiFi..");
  }

  // Print ESP32 Local IP Address
  Serial.println(WiFi.localIP());

  // Route for root / web page
  server.on("/", HTTP_GET, [](AsyncWebServerRequest *request){
    request->send(SPIFFS, "/index.html");
  });

  // Route to load style.css file
  server.on("/styles.css", HTTP_GET, [](AsyncWebServerRequest *request){
    request->send(SPIFFS, "/styles.css", "text/css");
  });

  // Start server
  server.begin();
}

void loop() {

}
When you hit upload, it will take a minute or so to flash the code to the ESP8266. You will see some output like this:

While the code is uploading, open the Arduino IDE Serial Monitor and set the Baud Rate to 115200. Once the code finishes uploading you will see:

The IP logged to the serial monitor is the IP address your network has assigned to the ESP8266. You can use this IP address if your browser to connect to your web server!
Step 2: Access the web server
Open up a new browser window (Chrome, Firefox, Safari, Edge, Internet Explorer, Brave, Chromium, any browser of your choosing) and in the address bar enter the IP address from the Arduino IDE Serial Monitor. Ta-da! You will see your HTML page with the CSS styling. Feel free to go and edit your HTML and CSS content, re-upload the data, and see your changes!

Conclusion
You have learned how to install the ESP8266 File System Uploader plugin for the Arduino IDE. You have written a static web page using HTML and CSS, and used the FSU plugin to upload those files to your ESP8266. Finally, we built a basic HTTP web server on the ESP8266 that serves our HTML and CSS files.
What you accomplished in this tutorial is just the tip of the iceberg when it comes to the capabilities of the ESP8266. Next, learn how to interact with your web page to sent HTTP request back to the server and get data, or control a robot like the ScioBot 2.0 WiFi!